


 MENU
MENUWelcome to the FieldView resource page for users of the Department of Defense (DoD) High Performance Computing Modernization Program (HPCMP) !
FieldView’s Client-Server mode has been improved to work seamlessly on HPCMP systems, allowing you to visualize your remote CFD results while taking advantage of multiple Compute Nodes in parallel. We designed this improved Client-Server mode in collaboration with the User Productivity Enhancement and Training team (PET). It has then been thoroughly tested by Tecplot on multiple HPCMP systems and validated by HPCMP users.
FieldView is fully supported by Tecplot, Inc. and receives regular feature enhancements and bug-fixes. For more in-depth documentation, tutorials, and support resources please visit www.tecplot.com/fieldview.
To set up FieldView for Client-Server & MPI Parallel operation on DoD HPCMP resources, read on.
Easier Client-Server and Parallel Setup from Your Local Machine to an HPC System
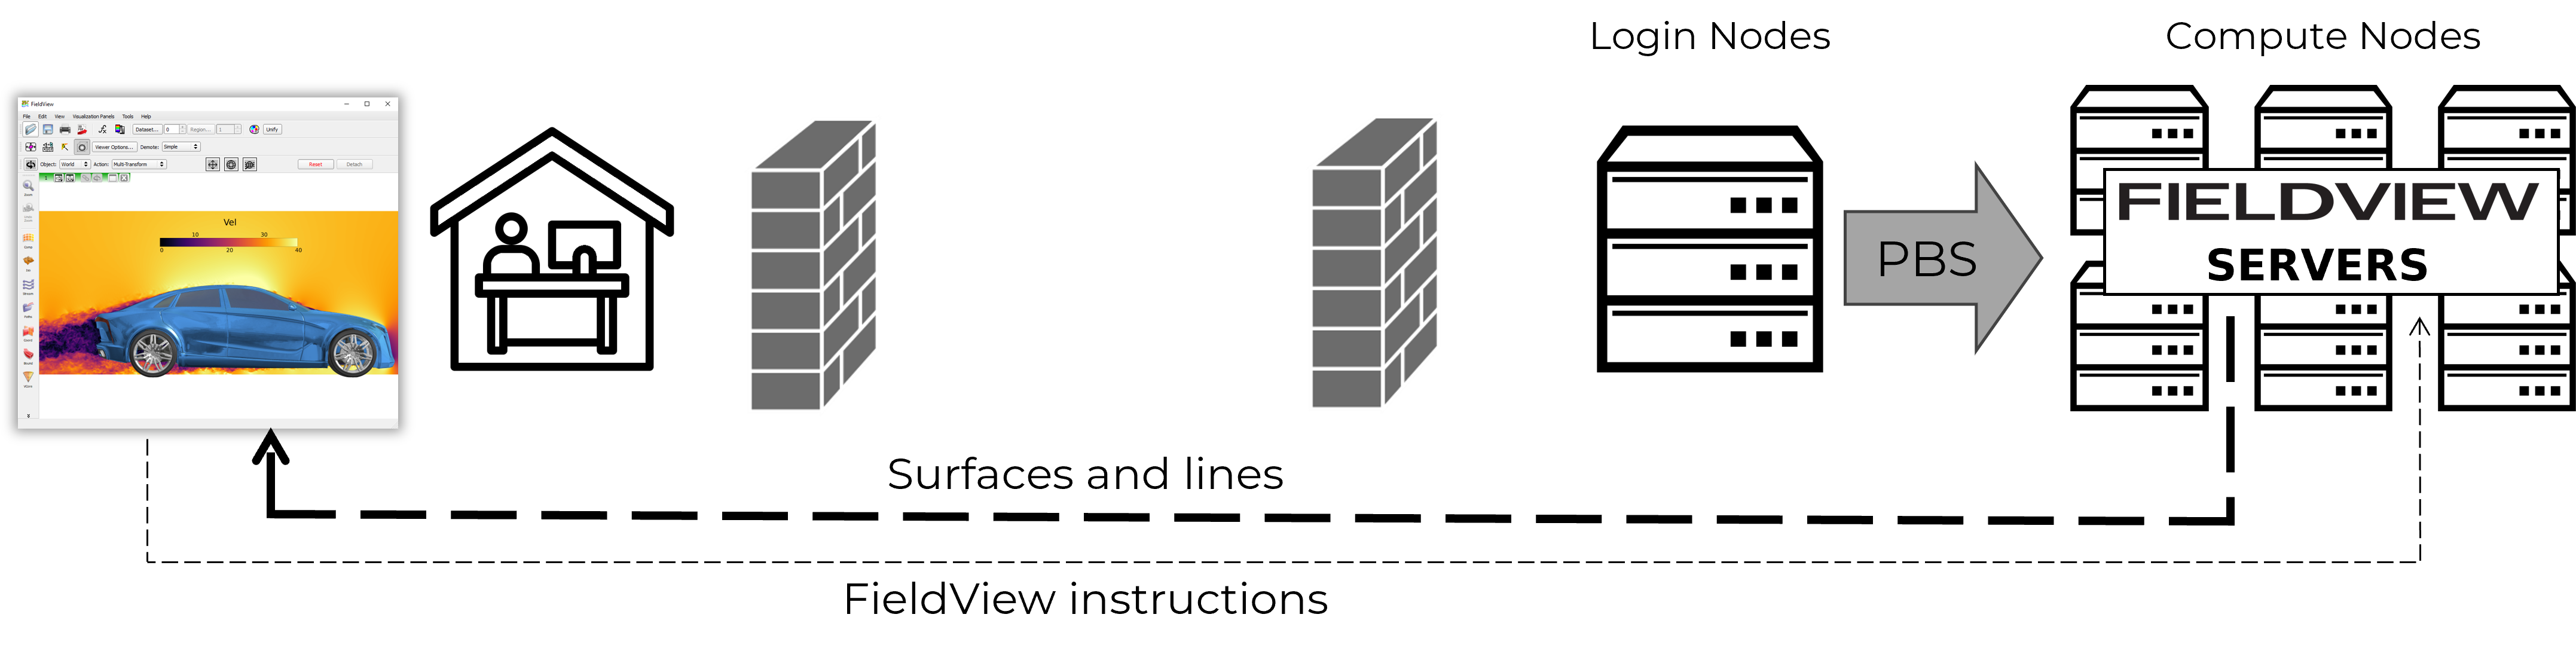
With FieldView 2022 and earlier versions, users may have faced challenges establishing Client-Server connection from their local machines to an HPC System as a result of layers of firewalls, the inability to run directly on compute nodes, etc. With FieldView 2023, it has never been easier to connect to an HPC system from your local machine. Client-Server Autostart now supports:
- Port forwarding to the Login Node through SSH or PuTTY
- FieldView Server(s) job submission through a scheduler (Currently PBS)
- Double port forwarding from the Compute Node back to the Local System
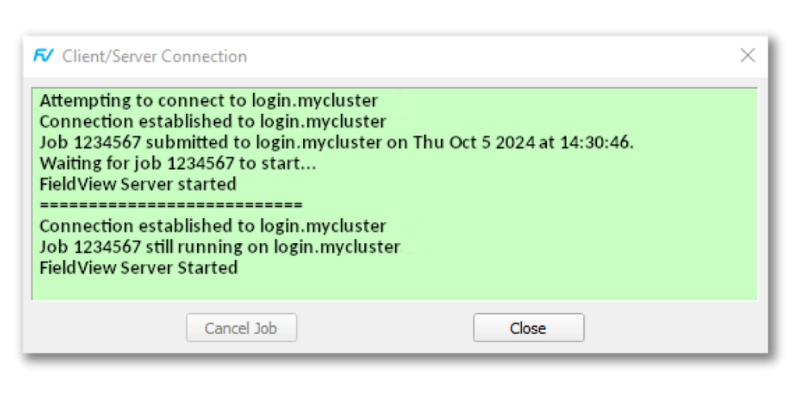
A New GUI panel has been added that shows progress as FieldView establishes the connection (pictured here). In addition, FieldView now comes with Open MPI 4.1.5.
Template Server Configuration Files
Submitting Jobs via a Scheduler
Connecting to DoD HPCMP requires that you can properly authenticate, as described in the Kerberos & Authentication section of DoD HPC’s instructions.
The following template Client-Server Configuration (.srv) files are provided to assist you in submitting a job to start post-processing servers for your FieldView Client. You can begin by downloading one of the following files.
| System | 64 cores, 4 nodes | 8 cores, 2 nodes | 8 cores, 1 node | Serial |
|---|---|---|---|---|
| Narwal | Narwhal64cores4nodes.srv | Narwhal8cores2node.srv | Narwhal8cores1node.srv | Narwhal1node.srv |
| Warhawk | Warhawk64cores4nodes.srv | Warhawk8cores2node.srv | Warhawk8cores1node.srv | Warhawk1node.srv |
If your preferred system is not listed above, you’ll need to adapt one of these files by editing the ServerName line. Note that, as of today, FieldView only supports PBS. Work is underway to also support Slurm
Once you have the template, you’ll need to make the following changes in order to submit the job with the scheduler directives specific to your needs. (These lines are not order dependent)
- Change the UserName: field (line-4) to the name of your authorized user on the server.
- Change the Allocation: field (line-5) to set your authorized allocation -A directive.
- Change the RemoteShell: field (line-6) to ssh, if you are not using plink (Windows) at your Client.
- Change the JobTime: field (line-7) for your desired -walltime directive.
- Adjust the Queue: field (line-8) to satisfy your desired -q directive.
- Adjust the NumCpus: field (line-10) to satisfy your desired -ncpus directives. (As noted below, each system may have different requirements for this value.)
- Optionally, adjust field NumProcs: (line-11) which specifies the mpiprocs directive which determines the number of MPI cores you will use.
- Optionally, adjust the NumNodes: field (line 12) to satisfy your desired -select directive.
- Adjust optional field StartDirectory: (line-13) to specify the directory where FieldView will start browsing for your CFD results on the server.
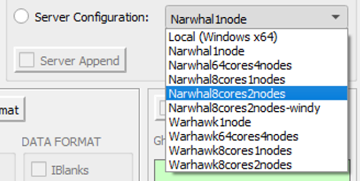
After modifying your file, save it (using your preferred filename.srv) to the sconfig directory of your FieldView Client installation. This can optionally be placed in any directory if you instruct FieldView to find it using the environment variable FV_SERVER_CONFIG_DIR=<dirname>.
The next time you start your FieldView Client, the new Server Configuration will be found in the list on your Data Input Panel.
If there are errors in the file, they will be reported in your FieldView console. If you request more NumProcs: than for which you are licensed, FieldView will throttle the setting back to what is available with your license.
For a full description on setting up this file, please see the section Step 3 – Set up a Server configuration File of the Installation Guide.
Note that if your job directives are out of specifications for the given HPC system, qsub will fail. For example, DoD HPCMP’s PBS guide for narwhal makes the following note:
Standard compute nodes on Narwhal will require ncpus=128. An exception to this rule is the transfer queue…”
FieldView keeps the user informed about the progress of the job submission in the Client/Server Connection panel (GUI), and will have more detailed information about the submitted queue to logfile FieldView_Autostart.log which can be found in the following locations:
Windows: C:\Users\<username>\AppData\Local\Tecplot\fieldview
Linux: ~/.local/share/Tecplot\fieldview
Mac: ~/Library/Application Support/Tecplot\fieldview
You can view a demonstration of submitting jobs to your scheduler by watching the tutorial below.
For assistance with scheduling Jobs using Server Configuration (.srv) files, please contact support@tecplot.com.