If you’ve just requested a free trial, it may take up to 1 business day. But you can start getting familiar with Tecplot 360 with resources on this page.
You have arrived at a one-stop shop for getting started with Tecplot 360. Technical Support is available to help you install your software and get up and running with your data and workflows. If you need help at any time as your work through this material, email your questions to support@tecplot.com. Here’s an index to this Getting Started Page with links to each section.
- Step 1: Collecting Your Resources
- Step 2: Loading Your Data
- Step 3: Exploring Your Data
- Step 4: Tecplot 360 Tips and Tricks
- Step 5: Automating Your Workflows
Step 1: Collecting Your Training Resources
- Request a Tecplot 360 Free Trial.
- Install Tecplot 360 (pdf) and activate your license.
- Survey the Tecplot 360 User’s Manual Introduction and Using the Workspace. (The User’s Manual is available in PDF or HTML formats).
- For a specific Tecplot 360 feature, search our Videos or the User’s Manual.
- The Getting Started Manual pdf is in your installation, and data used in Step 3 “Exploring Your Data” can be downloaded here:
Step 2: Loading Your Data
Tecplot 360 Supports the Following Data Formats
- CFD Formats: ANSYS Fluent (.cas, .dat, .cas.h5, .dat.h5), ANSYS CFX, CGNS, EnSight, FLOW-3D, HDF5, OpenFOAM, PLOT3D, Tecplot (.dat, .szplt, .plt), TRIX, VTK (.vtu, .vtm)
- Data Formats: Comma- or space-delimited ASCII, Excel (Windows only), HDF
- FEA Formats: ABAQUS, ANSYS, FIDAP Neutral, LSTC/DYNA input file, LSTC/DYNA, MSC/NASTRAN, MSC/Patran, PTC/Mechanica, SDRC/IDEAS universal, 3D Systems STL
- CONVERGE Data
- Complete List
Not finding the data loaders that you’re looking for? Email support@tecplot.com and if possible, please attach/share your data with us. If you’re a Python user, check-out our Python API which opens more doors for loading your XY and 2D-structured data.
Working with Tecplot File Types (Videos)
- Learn the differences between Tecplot DAT, PLT, and SZPLT Data File Formats
- Converting your data to SZL (.szplt) file format using Preplot and SZL Convert
Step 3: Exploring Your Data
The four video series below (External Flow, Transient Data, Comparing Grids, Finite Element Analysis) each walk you through how to work with key features and data files. Similar step-by-step tutorial instructions are written up in our Getting Started Guide (PDF).
External Flow Series
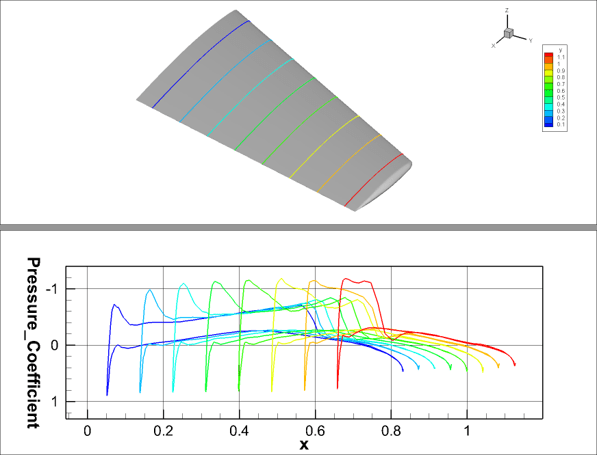
The External Flow series covers loading data, producing a basic plot, slicing, streamtraces, iso-surfaces, probing, and comparing simulated and experimental data, including normalizing the data. These videos use data from the Onera M6 wing model. The five videos in this playlist include:
- Loading and Manipulating Data
- Exploring a CFD Solution
- Comparing a CFD Simulation with Experimental Data
- Automation and Macros
- CFD Analyzer and Variable Calculation
Transient Data Series
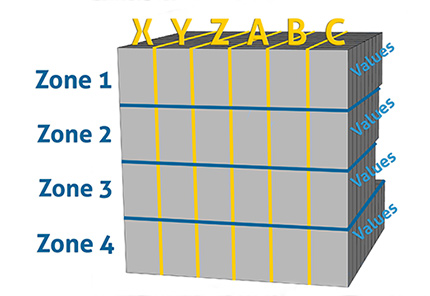
The Transient Data series uses a wind turbine data set with 127 time steps to understand how transient (time-based) data is structured. The five videos in this playlist cover how to produce animated contour plots, extract data over time for analysis, and calculate additional variables.
- Introduction to Transient Data
- Understanding Transient Data Through Extractions
- Fourier Transforms
- Calculating Variables and Using Contour Color Cutoff
- Frame Linking
Comparing Grids Series
The Comparing Grids series walks through comparing different datasets with the same grid in both Tecplot 360 and Tecplot Chorus. The third video compares two data sets with differing meshes. Videos in this playlist include:
- Comparing Grids in Tecplot 360
- Comparing Grids in Tecplot Chorus
- Interpolation of Differing Meshes
Finite Element Analysis (FEA) Series
This video series uses a transient FEA dataset of a connecting rod created with LSDYNA. The series shows progressive techniques for visualizing the maximum Von Mises Stress of the rotating rod. Videos in this playlist include:
- Identifying Regions of Maximum Stress
- Data Alter using IF Conditions
- Extracting Maximum Stress Using Macros
Step 4: Tecplot 360 Tips and Tricks

Watch the YouTube Clip on Structured 2D Data in Tecplot 360
Extend your knowledge of Tecplot 360. The videos and articles below cover essential topics to maximize your effectiveness while post-processing with Tecplot 360.
The Tecplot 360 Workspace
- Viewing Summary Dataset Information (video)
- Organizing datasets, zones, and variables – see the first 2 minutes of Tecplot 360 Basics Training: PyTecplot Part 2 (video)
- Relating datasets to frames – see the Tecplot 360 User’s Manual section on Data Hierarchy (HTML).
- Linking Frames (video)
- Rotating and Zooming (video)
- Details on the Tecplot 360 Workspace – see the User’s Manual (HTML)
- Saving Your Plot: Layouts and Stylesheets (video)
Plotting Data

Watch the video on Frame Linking
- Using the Zone Style Dialog (video)
- Volume and Surface Zones (video)
- Editing Axis Details (YouTube clip begins at t=165)
- Adding Text to Your Plot (video)
- Appending XY Line Data (YouTube clip begins at t=192)
- Extracting Surface Slices in XY Line Data
Contouring and Contour Groups
Isosurfaces, Slices, and Streamtraces
- Working with Iso-Surfaces (YouTube clip)
- Placing a Slice (video)
- Adding Streamtraces (video)
- Drawing No Slip Streamtraces (video)
- Calculating Streamtraces, Streaklines, and Particle Paths (video)
Creating a New Variable

Read the knowledgebase article on Calculating a New Variable Using the Specify Equations Dialog
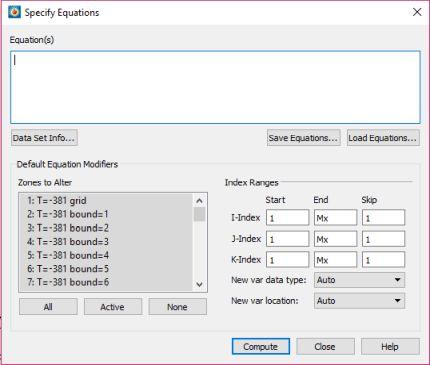
Variables can be calculated using the CFD Analyzer tool in Tecplot 360 or using the Specify Equations dialog. Below are videos and articles showing you how and when to use both.
CFD Analyzer
- Calculating velocity magnitude using the CFD Analyzer (CFDA) (YouTube clip begins at t=1839)
- Referencing Values, Fluid Properties, and Field Variables with the CFDA (video)
- CFDA Documentation (HTML)
Specify Equations Dialog
- Calculating a New Variable Using the Specify Equations Dialog (knowledgebase article)
- Calculating a New Variable (video)
- Creating a Variable Using an IF Condition (video)
- Specify Equations Documentation (HTML)
Exporting an Image or Animation
Watch the video on exporting images and animations.
Step 5: Automating Your Workflows
Workflows can be automated in Tecplot 360 using our macro language or our Python API, PyTecplot. In the Scripting menu, both can be recorded. You can also list and play macros using the Quick Macro Panel.
Macros
- Using the Quick Macro Panel (video) – note that this video was created before PyTecplot, so you won’t see PyTecplot options under the Scripting menu
- How to Add Macros to the Quick Macro Panel (knowledgebase article)
- Macro Functions are documented in the Scripting Guide
PyTecplot
- PyTecplot Quick Start (webinar recording)
- Best Practices for Scripting with PyTecplot (blog)
- More Information on PyTecplot (web page)
- PyTecplot Documentation (HTML)


